Power Tools for Patent Lawyers
We’ve covered a lot of ground on how you can use our reports for strategic planning, but Examiner Reports offer a bevy of powerful tools that let you quickly drill down to the most relevant data for your specific prosecution. In this post, we'll explore how to get the most of Examiner Reports' research by exploiting its interactivity.
Use the Filters, Luke
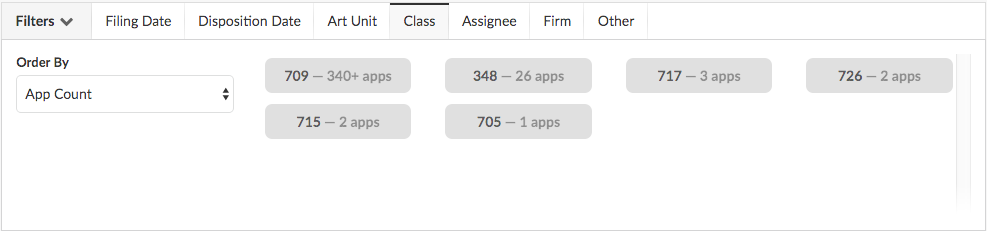
A frequently overlooked feature of both Juristat Examiner Reports and Juristat Epiphany are the filters. If you’re a patent attorney, one of the first things you should do when you load a Juristat report is open up the filters section. Even before you apply a filter, they’re worth looking at. Here’s what Examiner Mejia’s class filters look like:
We haven’t even applied a filter yet and we know what classes of apps he’s seen and how many apps per class.
Taking a look at the assignee filter shows you every assignee that this examiner has examined. This can be sorted by most apps to least, or by name, with a text search box:
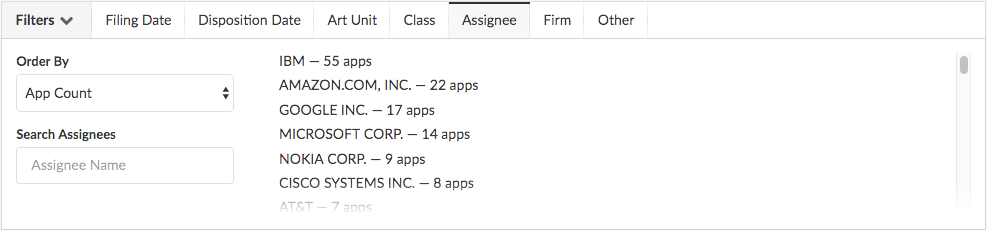 Type in the search box to start filtering by assignee name.
Just click any combination of assignee names and click “apply” to show only the apps for specific assignees. You can do the same thing for firms:
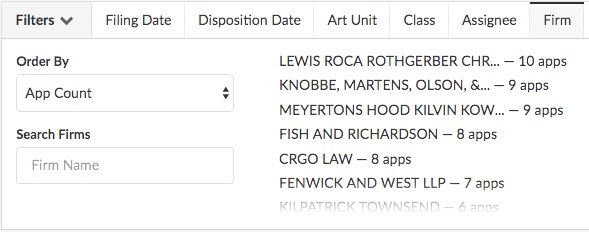 Quickly filter by firm name, too.
You can filter any Juristat report by filing or disposition date, art unit/tech center, class, assignee, firm, and several other useful attributes like continuity, foreign priority, and entity status.
Getting the Lay of the Land with Detailed Outcomes
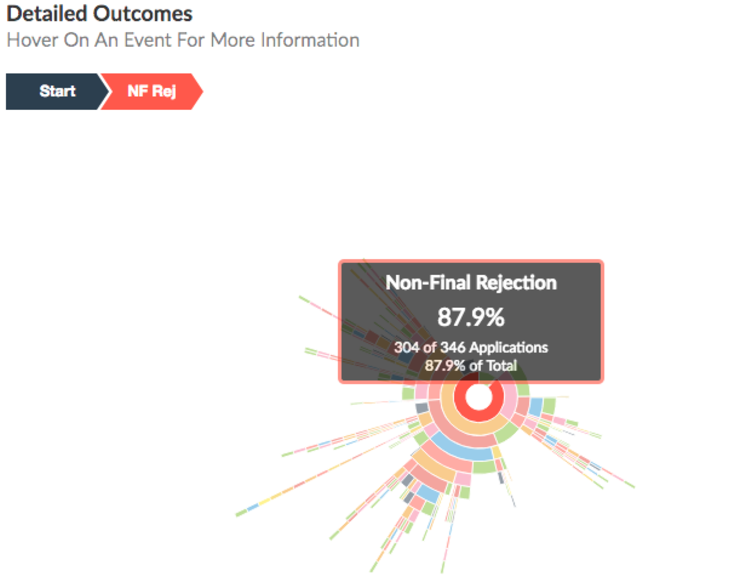
The Detailed Outcomes chart is a powerful and often misunderstood tool. It’s designed to give you a complete prosecution history for each application an examiner has seen, and let you see how many apps shared a similar path. Click the “Start” button to zoom out, and hover on a slice to get the full picture of a particular path:
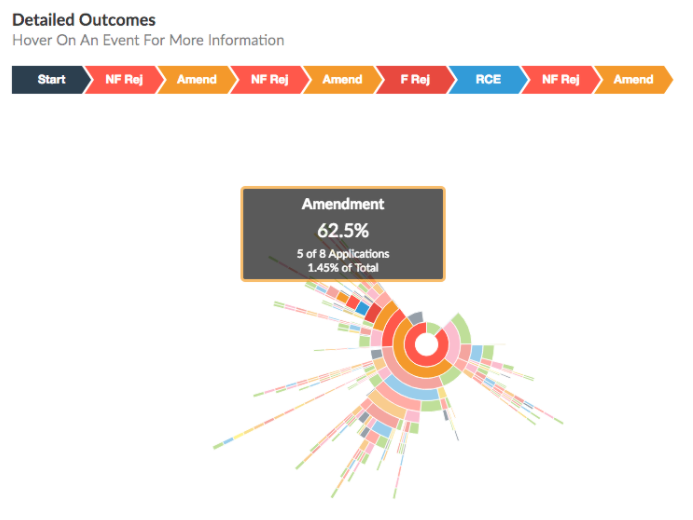
Let’s assume our app just got docketed to Examiner Mejia and we want to see what the most likely prosecution path is. We can see that the first ring is mostly red – a non-final rejection, so that’ s good place to start:
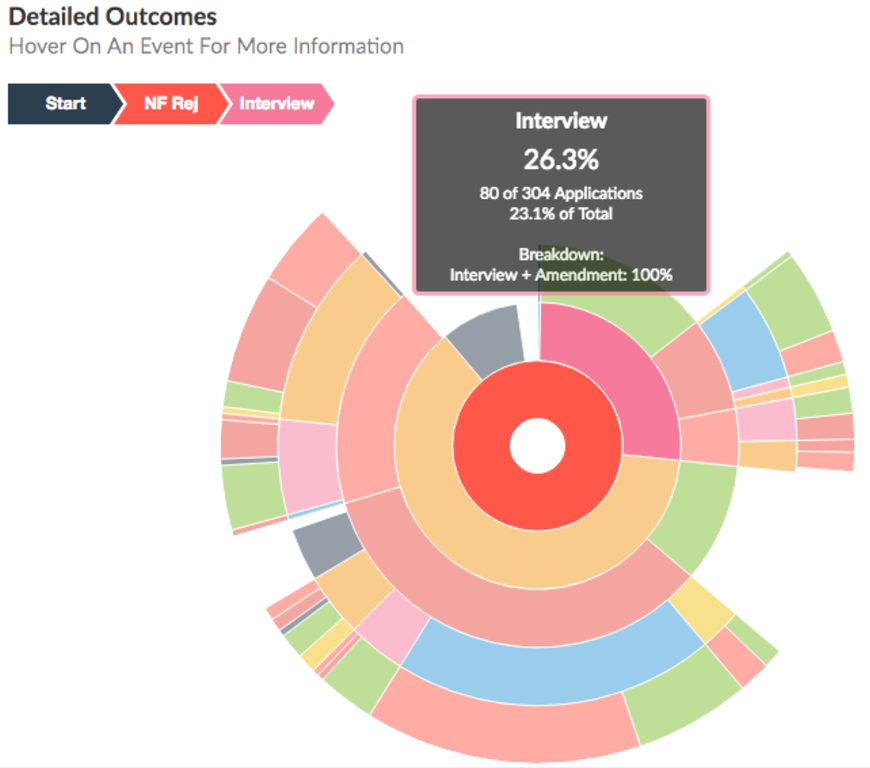
Click on the red non-final rejection section to zoom in. Already we’ve got some interesting information. Most people – 62% – filed an amendment after this stage, without an interview. But 26% filed an amendment after an interview and 53.8% of them (80/304) were allowed immediately thereafter.
Let’s go one non-final rejection deeper to see if we can spot a trend. Here’s the next non-final in the flow:
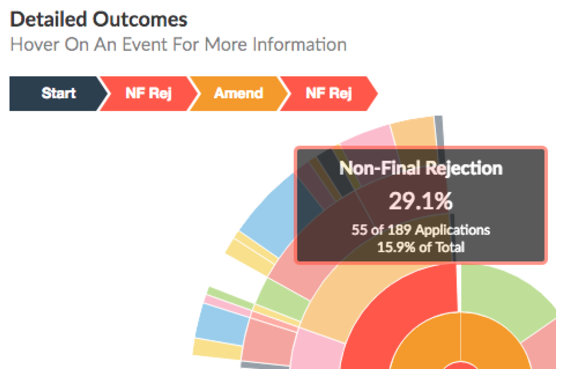
And here we see again that interview + amendment gets you the best outcome at this stage of your prosecution.
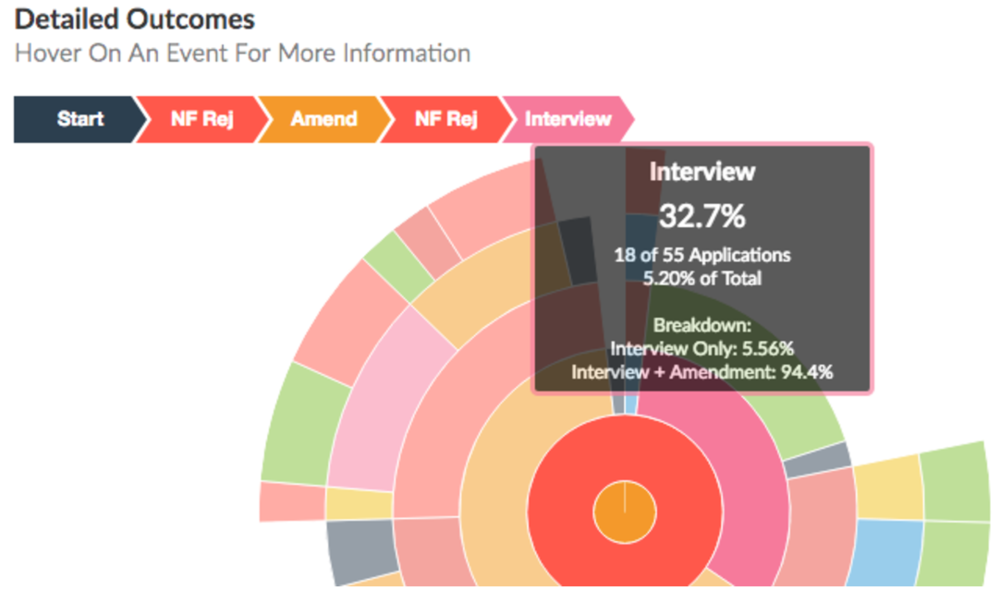
One last thing. Take a look at the whole chart at this stage of our imaginary prosecution:
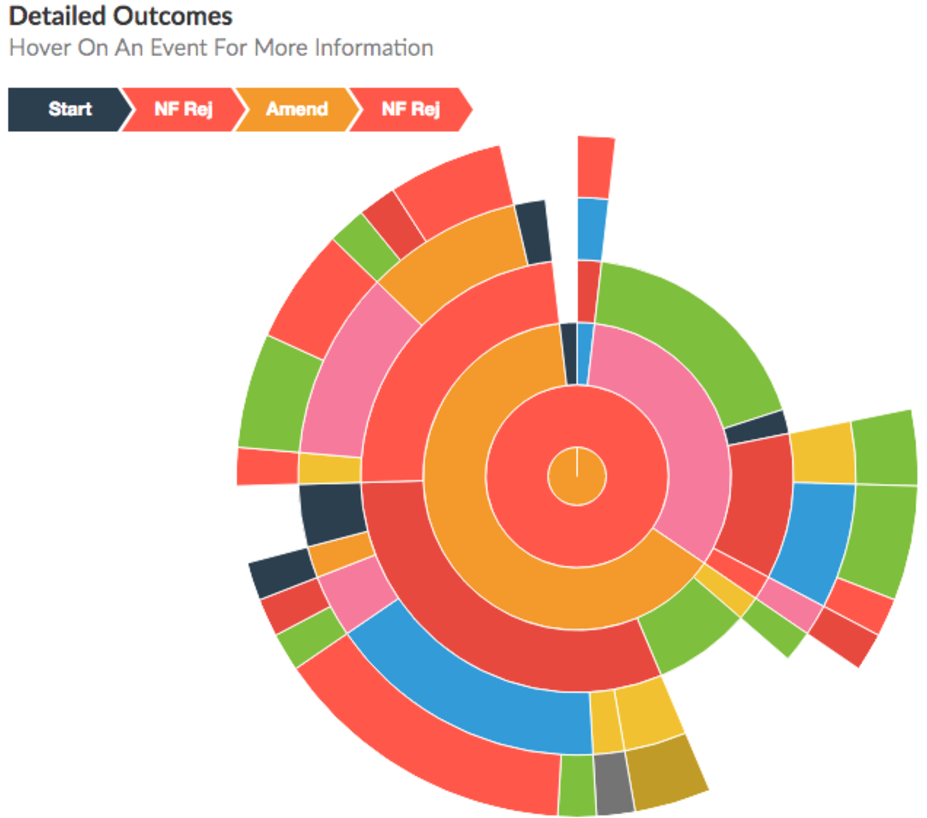
We’re at our second office action – right at the average for Examiner Mejia – and we have a pretty interesting perspective. We can see at-a-glance that although most people simply file another amendment after their second non-final rejection, they go on for several more rounds of prosecution than those that interview. In fact, take a look at what comes after every interview you can see in the Detailed Outcomes. This lines up well with the Effect of Interview on Allowance Rates statistic in the Examiner Overview section of the report. Again, we’re building context and reinforcing intuition by looking at data multiple different ways.
We’ll stop there with the Detailed Outcomes chart, but don’t hesitate to dig into it now that you’ve got a better understanding of how it works and why it’s so valuable.
Finding the Relevant Rejections and Responses
Rejection Text Search (BETA)
Note: This feature is technically in “Beta” while we load all the rejections text into our text search, but we didn’t see any reason to not release it you now. More data is being loaded in daily, and it should be complete for all examiners by Nov. 1, 2016.
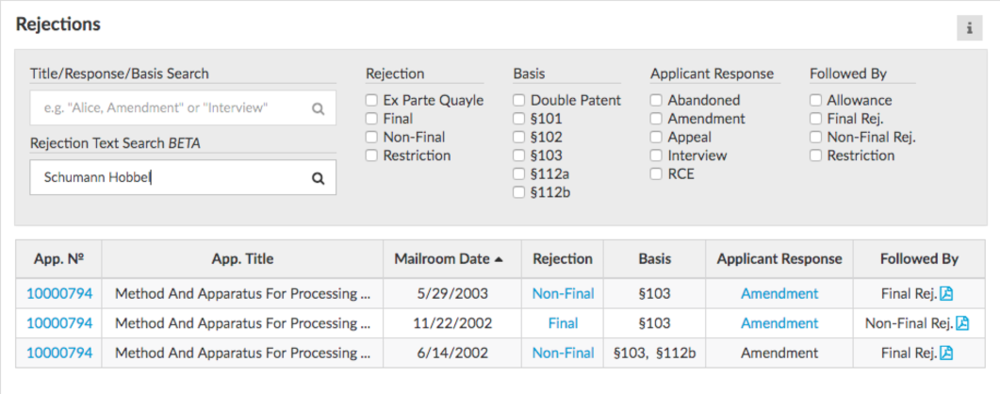
One of our most requested features is allowing you to search through the text of rejections your examiner has issued, and now you can. As an example, let’s take a look at Examiner David Parsley, and imagine you just got a rejection where he’s cited Schumann et al., and Hobbel, et al.:

While the rejections search doesn’t currently pull out cited art in a rejection explicitly, using the new rejections search, you can trivially find all the rejections in which Mr. Parsley has cited it. You want to see who else has faced a similar rejection, several of his rejections.
Mr. Parsley has over 300 rejections in Juristat’s database, but by simply typing “Schumann Hobbel” into the rejections search box, we narrow it down to 4, all which contain “Schumann” and “Hobbel”:
Checkbox filters make it easier to filter the rejection results by a specific sequence of events. You can even combine the new rejection text search with the checkbox filters for more fine-grained results. Let’s extend our text search example above to show only the rejections that cited Schumann et al., and Hobbel, et al., where the applicant responded with an amendment, and Mr. Parsley responded with a final rejection:
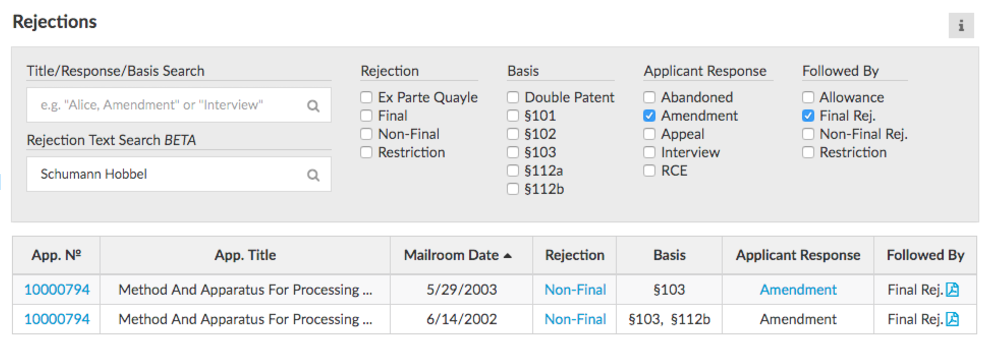
As always, click to open (or right click and “save as”) to get the PDFs of any hyperlinked document in the table. Note: the checkbox filters now populate based on the content of the table, so if you don’t see an “Alice” filter, don’t be alarmed. That just means we didn’t detect any Alice rejections for that examiner.
